App Settings
In your App Settings, you'll find vital app information for connecting ByteBrew to your apps like your Game ID and SDK Key.
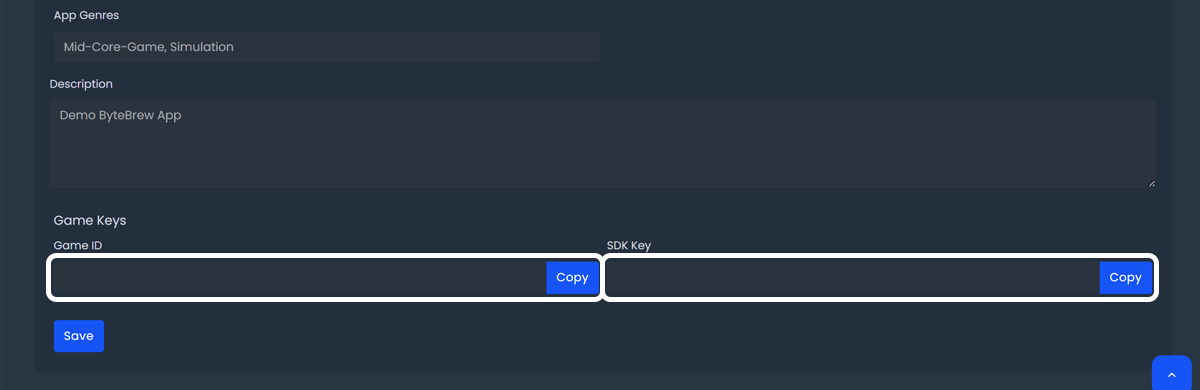
Find Your Game ID and SDK Key
After creating your app on the ByteBrew dashboard, every app has a uniquely generated Game ID and SDK Key. These two values are used to connect the ByteBrew SDK in your app with our system. They can both easily be found in your App Settings by scrolling to the bottom of the page.
Other App Settings
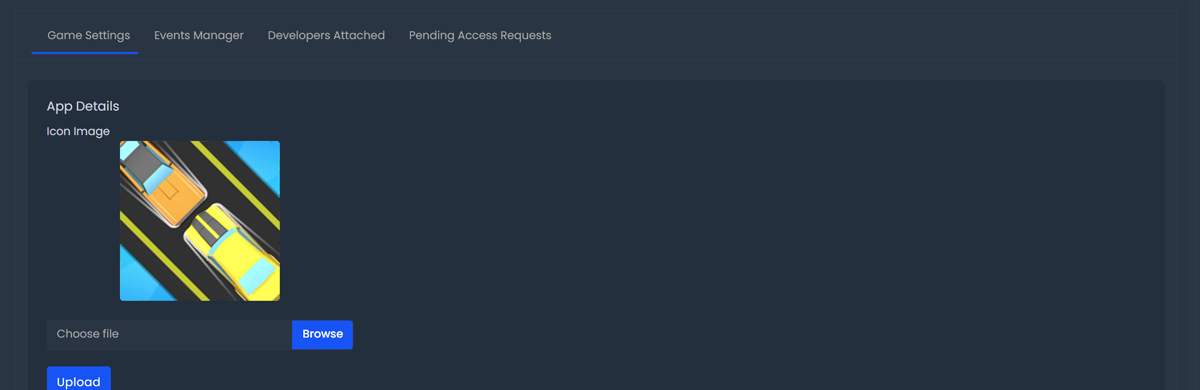
Under your App Settings tab, you also have the option to edit or update your apps other info you inputted during the app creation process. See table below for all the editable fields in App Settings.
| App Icon | Upload an image for your game to the dashboard. The following are accepted photo types: PNG or JPEG |
|---|---|
| Bundle Identifier | Edit the Bundle ID on iOS or Package Name for Android (Ex. com.examplestudio.appname) of your app or game. |
| App ID | Edit the Apple ID of your app or game. This is only for iOS apps. |
| Apple App Shared Secret | Edit your Apple App Shared Secret to start using ByteBrew's In-App Purchase validation. App Shared Secret is a unique key to receive receipts for your app's in-app purchases for iOS only. |
| Google License Key | Edit your Google License Key to start using ByteBrew's In-App Purchase validation. Google License Key is a unique key to receive receipts for your app's in-app purchases for Android only. |
Invite Developers to Your Game
Inviting a teammate, developer, publisher, or partner to a specific game your working on is a great way to securely collaborate on one game without having to invite them to your studio account.
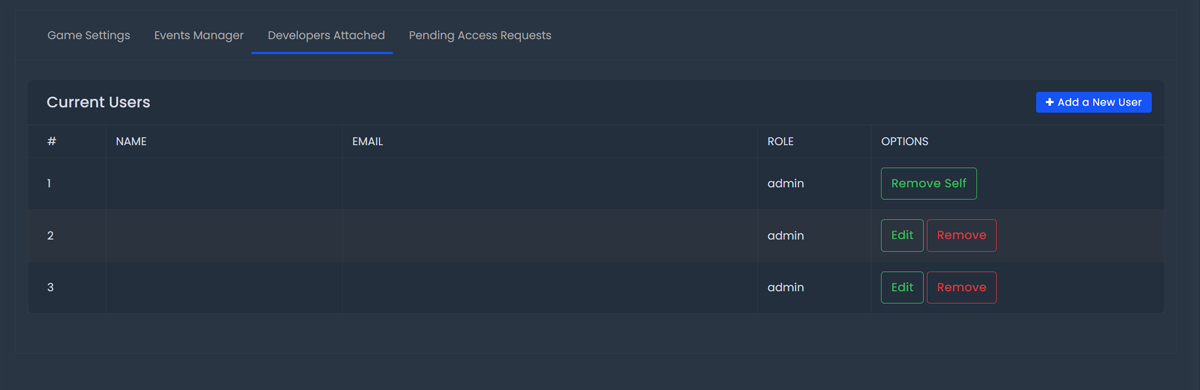
Send App Invites
To send an invite to a developer to an individual app, go to the "Developers Attached" tab under your App Settings and select "Add New User".
Choose Game Roles
After selecting "Add New User", fill in the developer's email, and choose their role for your game. After hitting "Add" the system will send an email to the invited user, inviting them to the game.
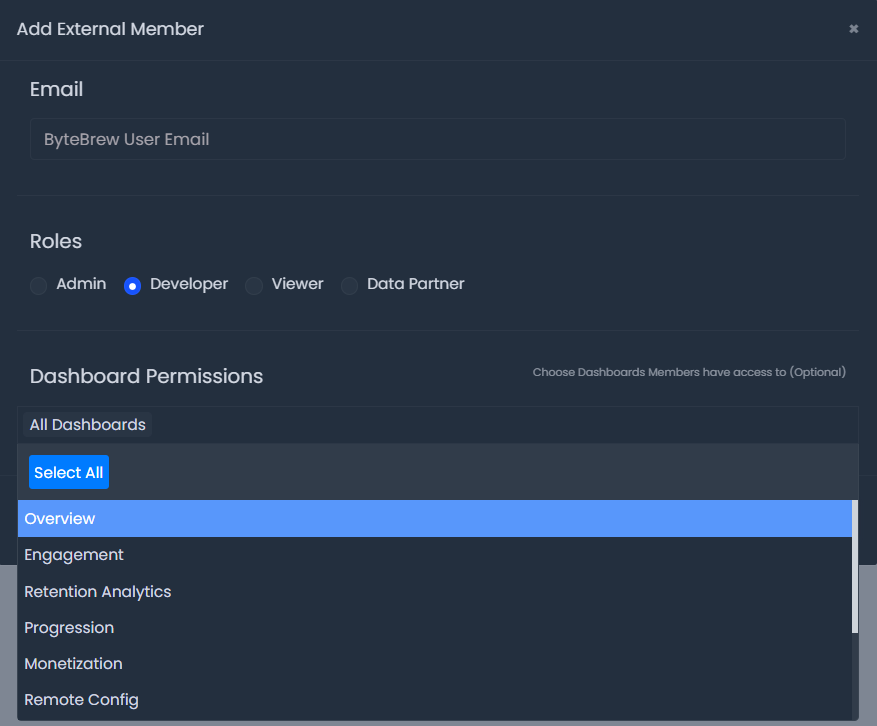
For Game Invites, we have three options: Admin, Developer, and Viewer. See the permissions for each role in the table below.
| Role | Definition | Send App Invites | Authorize App Transfers | Remove Other Users | Edit App Settings | View Analytics | Can access all the dashboards |
|---|---|---|---|---|---|---|---|
| Admin | A leader or authority member of the app, this type of user will be able to invite other app developers, authorize app transfers, edit app settings, and view all the analytic data. | done | done | done | done | done | done |
| Developer | A supporting member of the app, this type of users will be able to edit the app settings, and view analytics, but not invite users or transfer apps. | close | close | close | done | done | asterisk |
| Viewer | An external member of the app, this type of user will only be able to view analytics in the app. This is best used when inviting app publishers. | close | close | close | close | done | asterisk |
| Data Partner | An external member of the app, this type of user will only be able to view analytics in the app. This is best used when inviting a platform to extract metrics & KPIs using the Ale Metrics API. | close | close | close | close | done | asterisk |
asterisk = customizable per user.
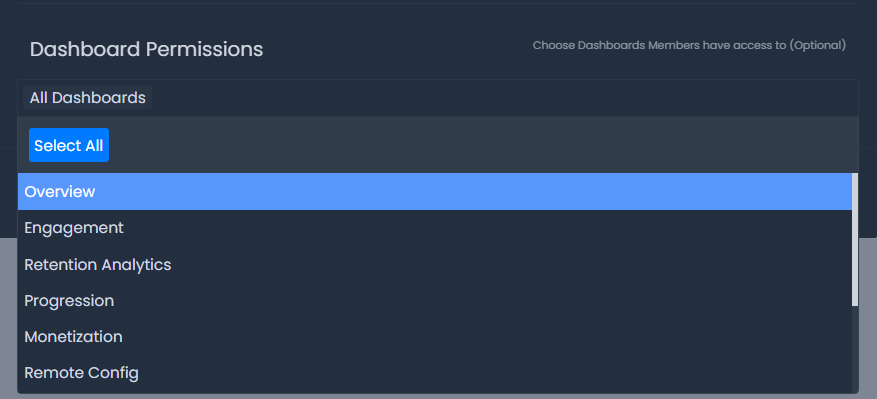
Editing App Dashboard Access
Choose which dashboards your user will have access to by selecting dashboards from the dropdown list. If left unselected, users will have access to all dashboards by default.
Accepting App Invites
When you've been invited to an app on ByteBrew, you will recieve a App Invite email. Click the accept button in the email to accept the invite and finalize the process.
Remove Developers from Your App
To remove an invited member of your app, go to the "Developer Attached" tab under your App Settings and click "Remove" next to their name.
Remove Yourself from an App
To remove yourself from an app you've been added to, go to the "Developer Attached" tab under your App Settings and click "Remove Self" next to your name.
Events Manager
Watch Video play_circleEvents Manager tab in your App Settings, let's you manage your app's incoming custom events. Events Manager will automatically populate all of your app's custom events and their subparameters that you've tracked in the ByteBrew SDK. Using this page, you can control which events or subparamters you'd to pause/turn off from showing up in your analytics dashboard.
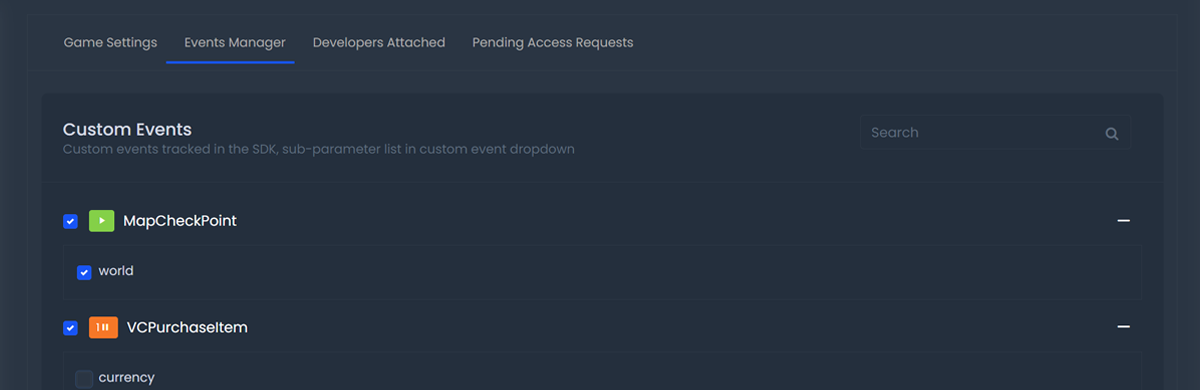
Event Status
Event Statuses are labelled on the events to give you a quick view of which events are enabled, partically paused, or turned off. See table below to learn more about Event Statuses.
| Event Status | Color | Definition |
|---|---|---|
| Enabled | Green | Green marker on an event means that the event and all of it's subparameters are enabled on your dashboard. |
| Partially Stopped | Yellow | Yellow marker on an event means that the event is still enabled, but one or more it's subparamters are turned off. There is a number indicator to see how many subparameters under that event are paused. |
| Stopped | Red | Red marker on an event means that both the event and all of it's subparameters are turned off on your dashboard. |
How to Stop Custom Events
Using Events Manager, you can stop any of the custom events your tracking in your app from showing up on your analytics dashboard by clicking on the checkmark box next to the event and hitting "Save".
How to Resume Custom Events
To resume a stopped custom event, click on the empty checkmark box next to the event you want to resume to re-enable it and save your changes.
How to Stop Sub-Parameters
By clicking to expand the Custom Event in your Events Manager, you'll see all the event's tracking subparameters populate. Each of these parameters can be individually paused by clicking off the checkmark box next to the parameter and saving your changes.
How to Resume Sub-Parameters
To resume a stopped subparameter, click on the empty checkmark box next to the subparameter you want to resume to re-enable it and save your changes.
Accepting Pending App Access Requests
Using our HOPS Publisher API, an external team can request access to your app if they are starting to collaborate with you. All access requests from HOPS API will be listed under this tab in your App Settings.
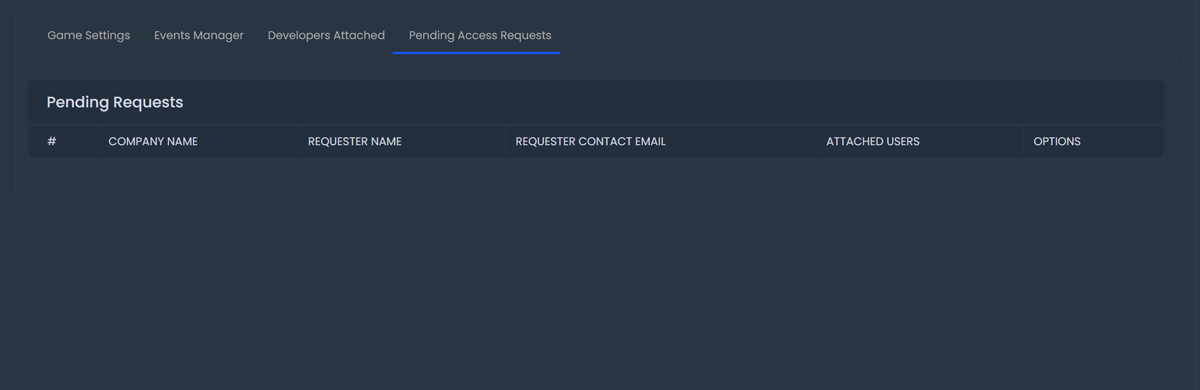
Approve Access Request
To approve an access request, go to the "Pending Access Request" tab and approve the listed user requesting acccess.
Deny Access Request
To deny an access request, go to the "Pending Access Request" tab and deny the listed user requesting access.
FAQs
There are a few reasons you might not be able to accept an invite you've received to an app. (1) If the email is older than 12 hours, than it will not work for security purposes. To remedy this, just have the app owner resend an invite. (2) If you do not have a ByteBrew account, you will need to first make one and then re-click to accept the app invite.
The Demo App settings cannot be reached by any account.
Yes! Inviting teammates to your studio account can be accomplished by using Invite Team Members on our platform.
Transfering your app to another studio account can be accomplished using App Transfers on our platform.