Required to Start using Notifications
To start using the Notifications dashboard in Push Notifications, you must first have initialized the ByteBrew SDK and added the single code line for push notifications in your integration. On the ByteBrew dashboard, make sure have created your push app and setup your app's iOS and/or Android push notification settings.
Building Notifications
Watch Video play_circleUsing Notifications, you can build automated cross-platform push notifications to deliver to your players at the set schedule or trigger you've selected for each message. See sections below on how to create a notification on the push notification dashboard.
Setting up a Notification
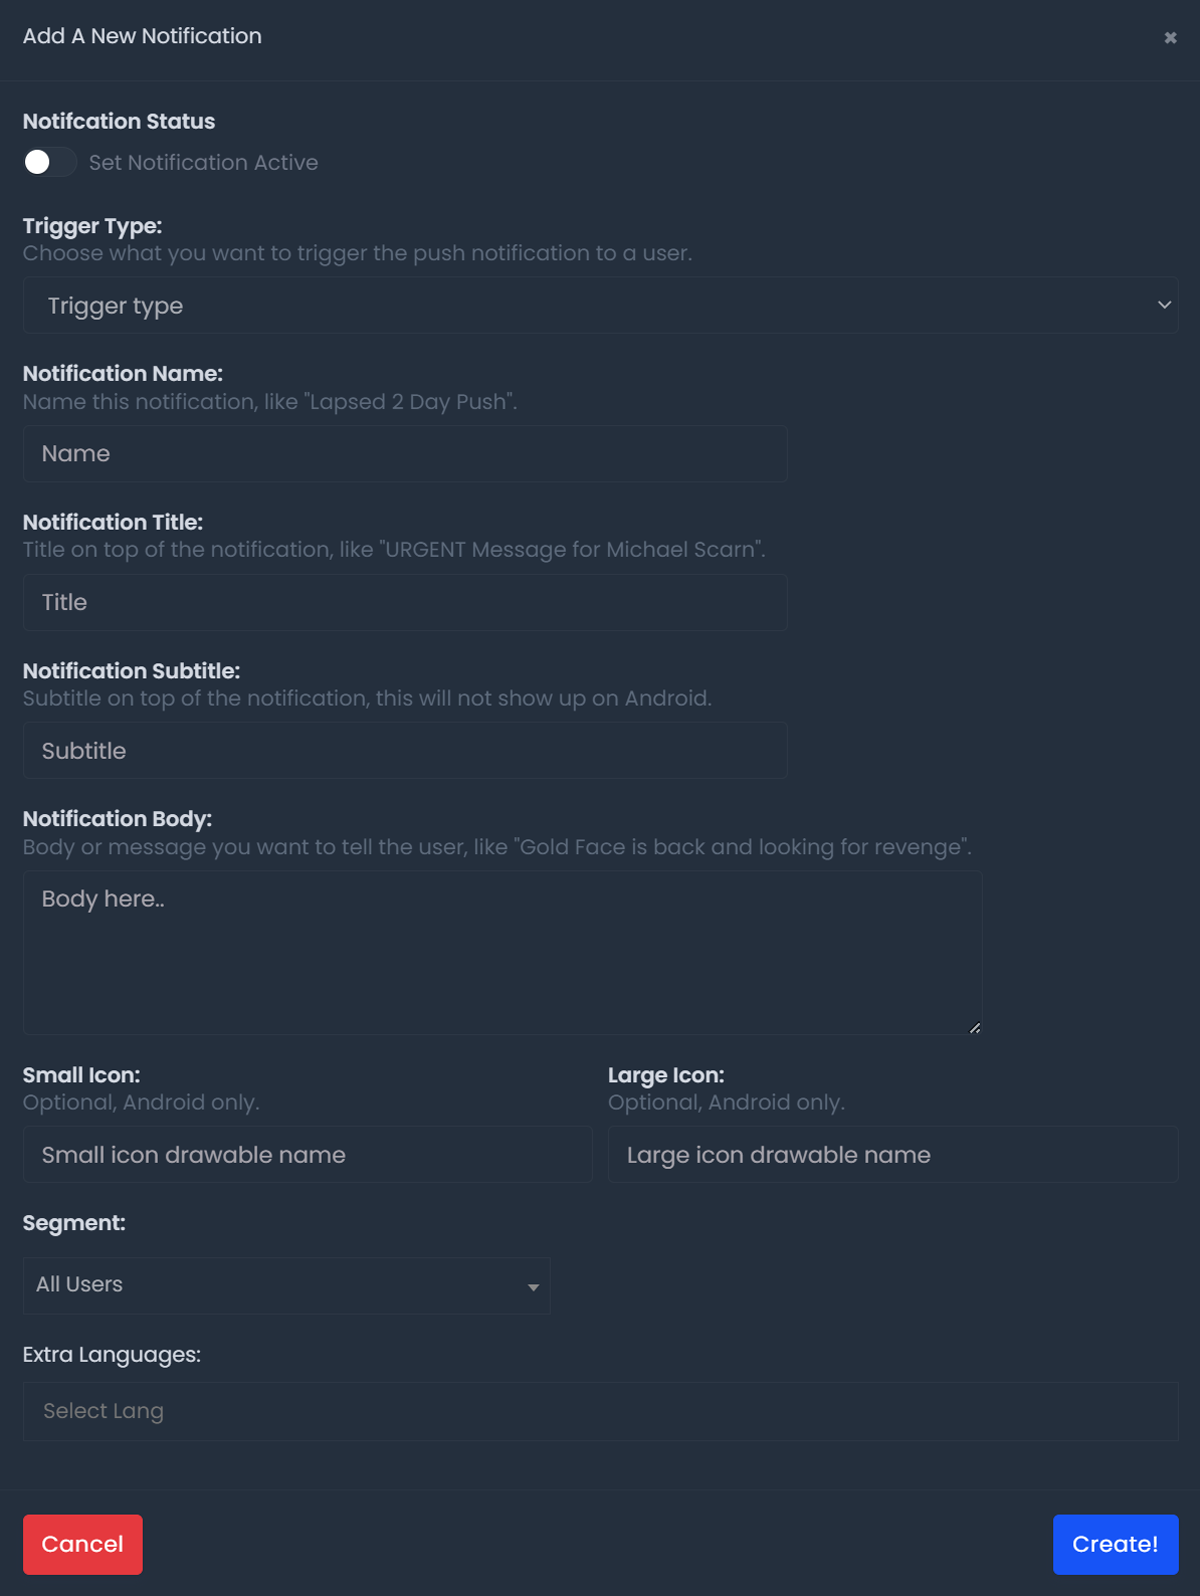
To setup a notification, open the Notification settings panel by clicking the "Create Notification" button. Follow the steps below to finish setting up a notification:
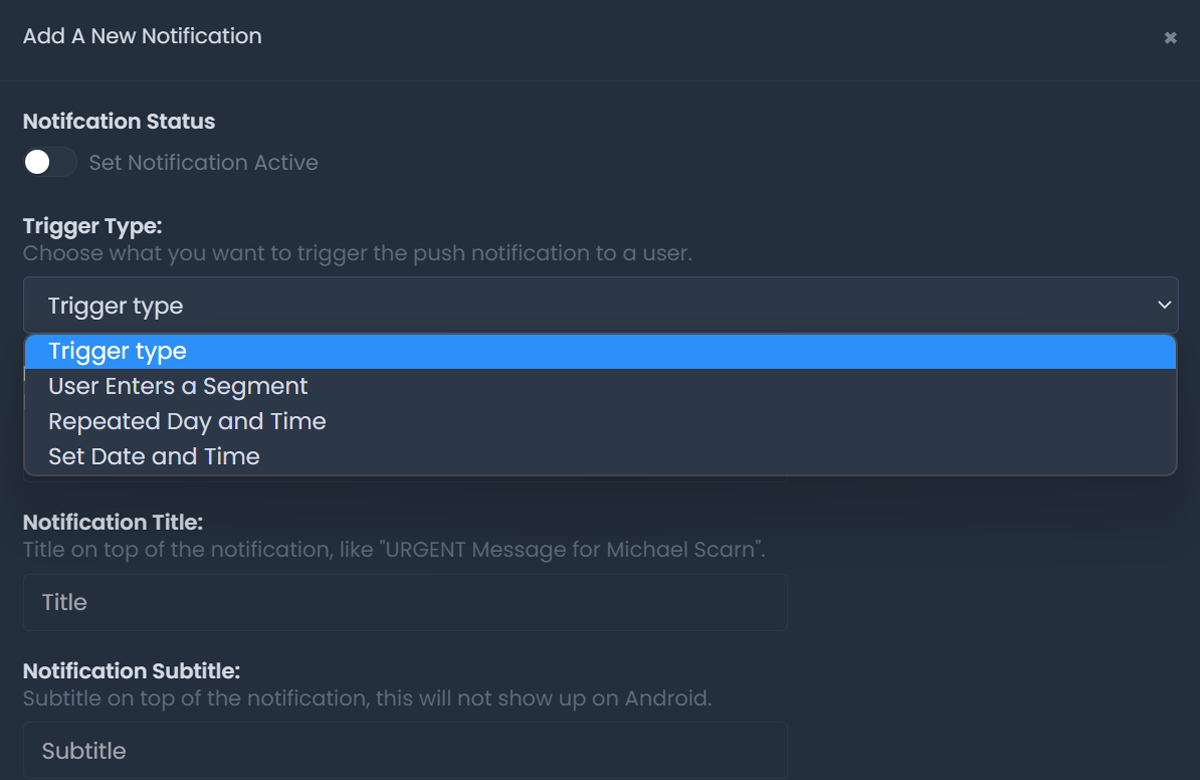
Select Notification Trigger:
Choose how you'd like your notification to deliver to your players. See the options for triggering a notification below:
Add Notification Name: The name of the notification that shows up only on the ByteBrew dashboard.
Input Notification Message Elements:
Add your push notification design you want sent to your players using the following fields:
Android Extra Settings:
See the following Android only extra settings you have available:
Select Segment: Choose the segment from the dropdown that you want linked to the notification.
Choose Localized Languages: (Optional) Add any localized languages you'd like under the notification. After selecting a langauge, a set of additional message fields will be added for you to input your localized notification language for your selected additional localizations.
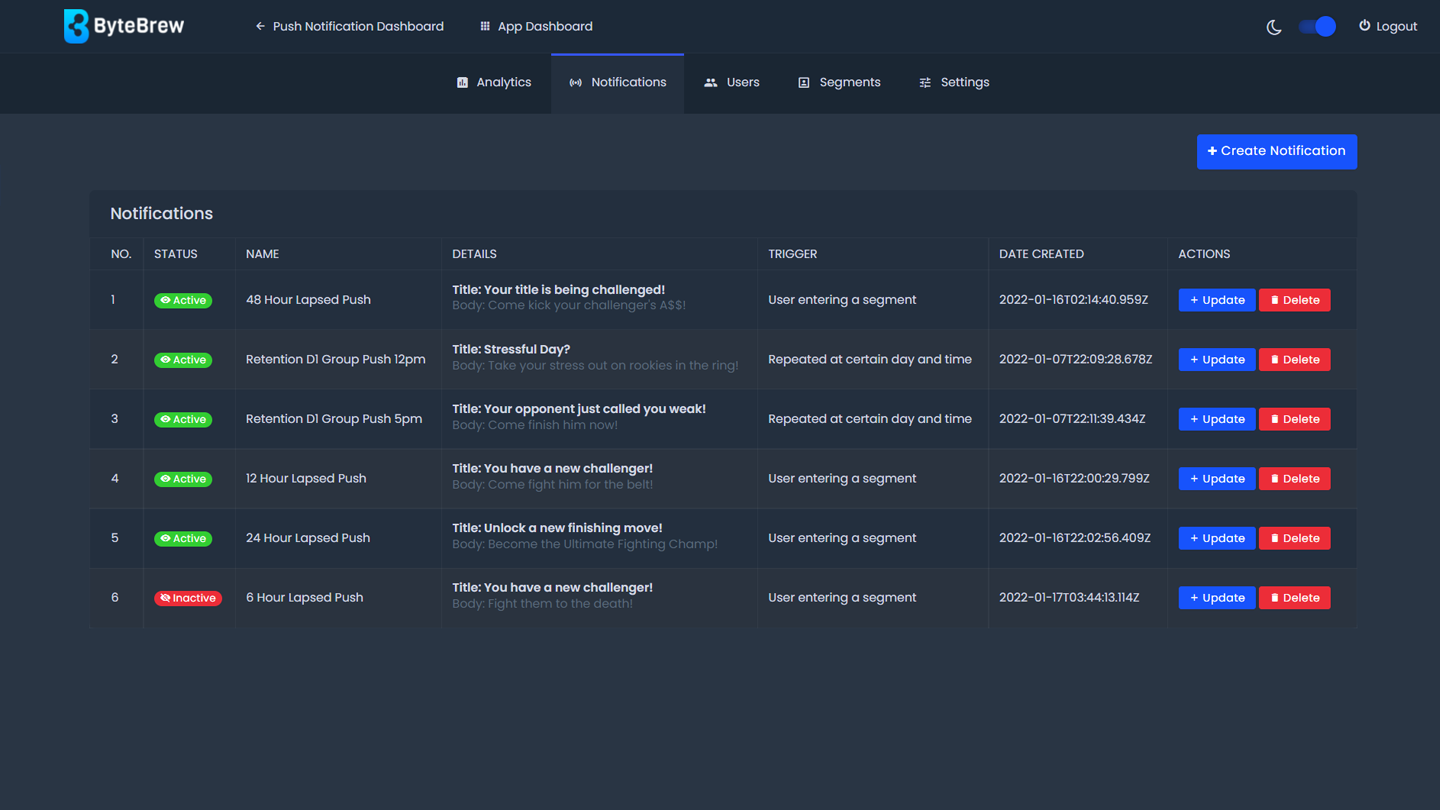
Update Notifications
Notifications you've created can be updated by selecting the "update" button next to the notification row you wish to adjust and applying the changes to the notification settings panel. If you make changes to a live notification, changes will automatically be applied to the notification settings.
Delete Notifications
To remove a notification that you've built, select the "Delete" button on the notification you want to remove and confirm the deletion.
FAQs
Yes, however, updating a trigger type will automatically re-define the notification automation to the updated setting.
Yes, by selecting the repeat time options under trigger type of the notification settings.
Yes, if you change the a segment's settings that is in use by a notification then the automated delivery for that notification will automatically update to the new settings.